HuntOps
5/18/2020 - Update The Elastic Stack in ROCK
I am still digging out from some time away, but I wanted to drop a quick note on the process to update the Elastic Stack to 7.7, which includes a new Cases feature in the SIEM.
If you’re interested in the full release notes for 7.7.0, you can check them out over here, but I wanted to highlight the new Cases feature.. It’s still Beta, but it’s a good start and with Elastic’s aggressive release cycle, I expect this to mature rapidly.
ROCK 2.5.1 comes with Elastic 7.6.0, so while the ROCK project does the complete testing of 7.7.0 (which came out on May 13, 2020), we can do the update manually. First, get ROCK installed as documented here. Next, let’s update the stack.
Before we get started, yes I am a contributor to the ROCK project and I work for Elastic. I have only done limited testing with 7.7.0 and ROCK, so please don’t do this on a production system. I speak for neither project or company.
Let’s enable the Elastic repo.
sudo vi /etc/yum.repos.d/elastic.repo
# anywhere in the file
enabled=1
Next, let’s update the stack.
sudo systemctl stop kibana filebeat logstash elasticsearch
sudo yum update elasticsearch logstash filebeat kibana -y
sudo systemctl daemon-reload
sudo systemctl start elasticsearch logstash filebeat kibana
Let’s test to make sure the update worked with curl localhost:9200 and you should see 7.7.0 as the new Elasticsearch version.
curl localhost:9200
{
  "name" : "rock",
  "cluster_name" : "rocknsm",
  "cluster_uuid" : "OPJDLfhjRw2BlSJU-Q3Ydw",
  "version" : {
    "number" : "7.7.0",
    "build_flavor" : "default",
    "build_type" : "rpm",
    "build_hash" : "81a1e9eda8e6183f5237786246f6dced26a10eaf",
    "build_date" : "2020-05-12T02:01:37.602180Z",
    "build_snapshot" : false,
    "lucene_version" : "8.5.1",
    "minimum_wire_compatibility_version" : "6.8.0",
    "minimum_index_compatibility_version" : "6.0.0-beta1"
  },
  "tagline" : "You Know, for Search"
}
Now that we’ve updated the stack, we can move on to explore Cases.
For this, we can just use some packets from the Hancitor malware I discussed a bit ago (see the packets above).
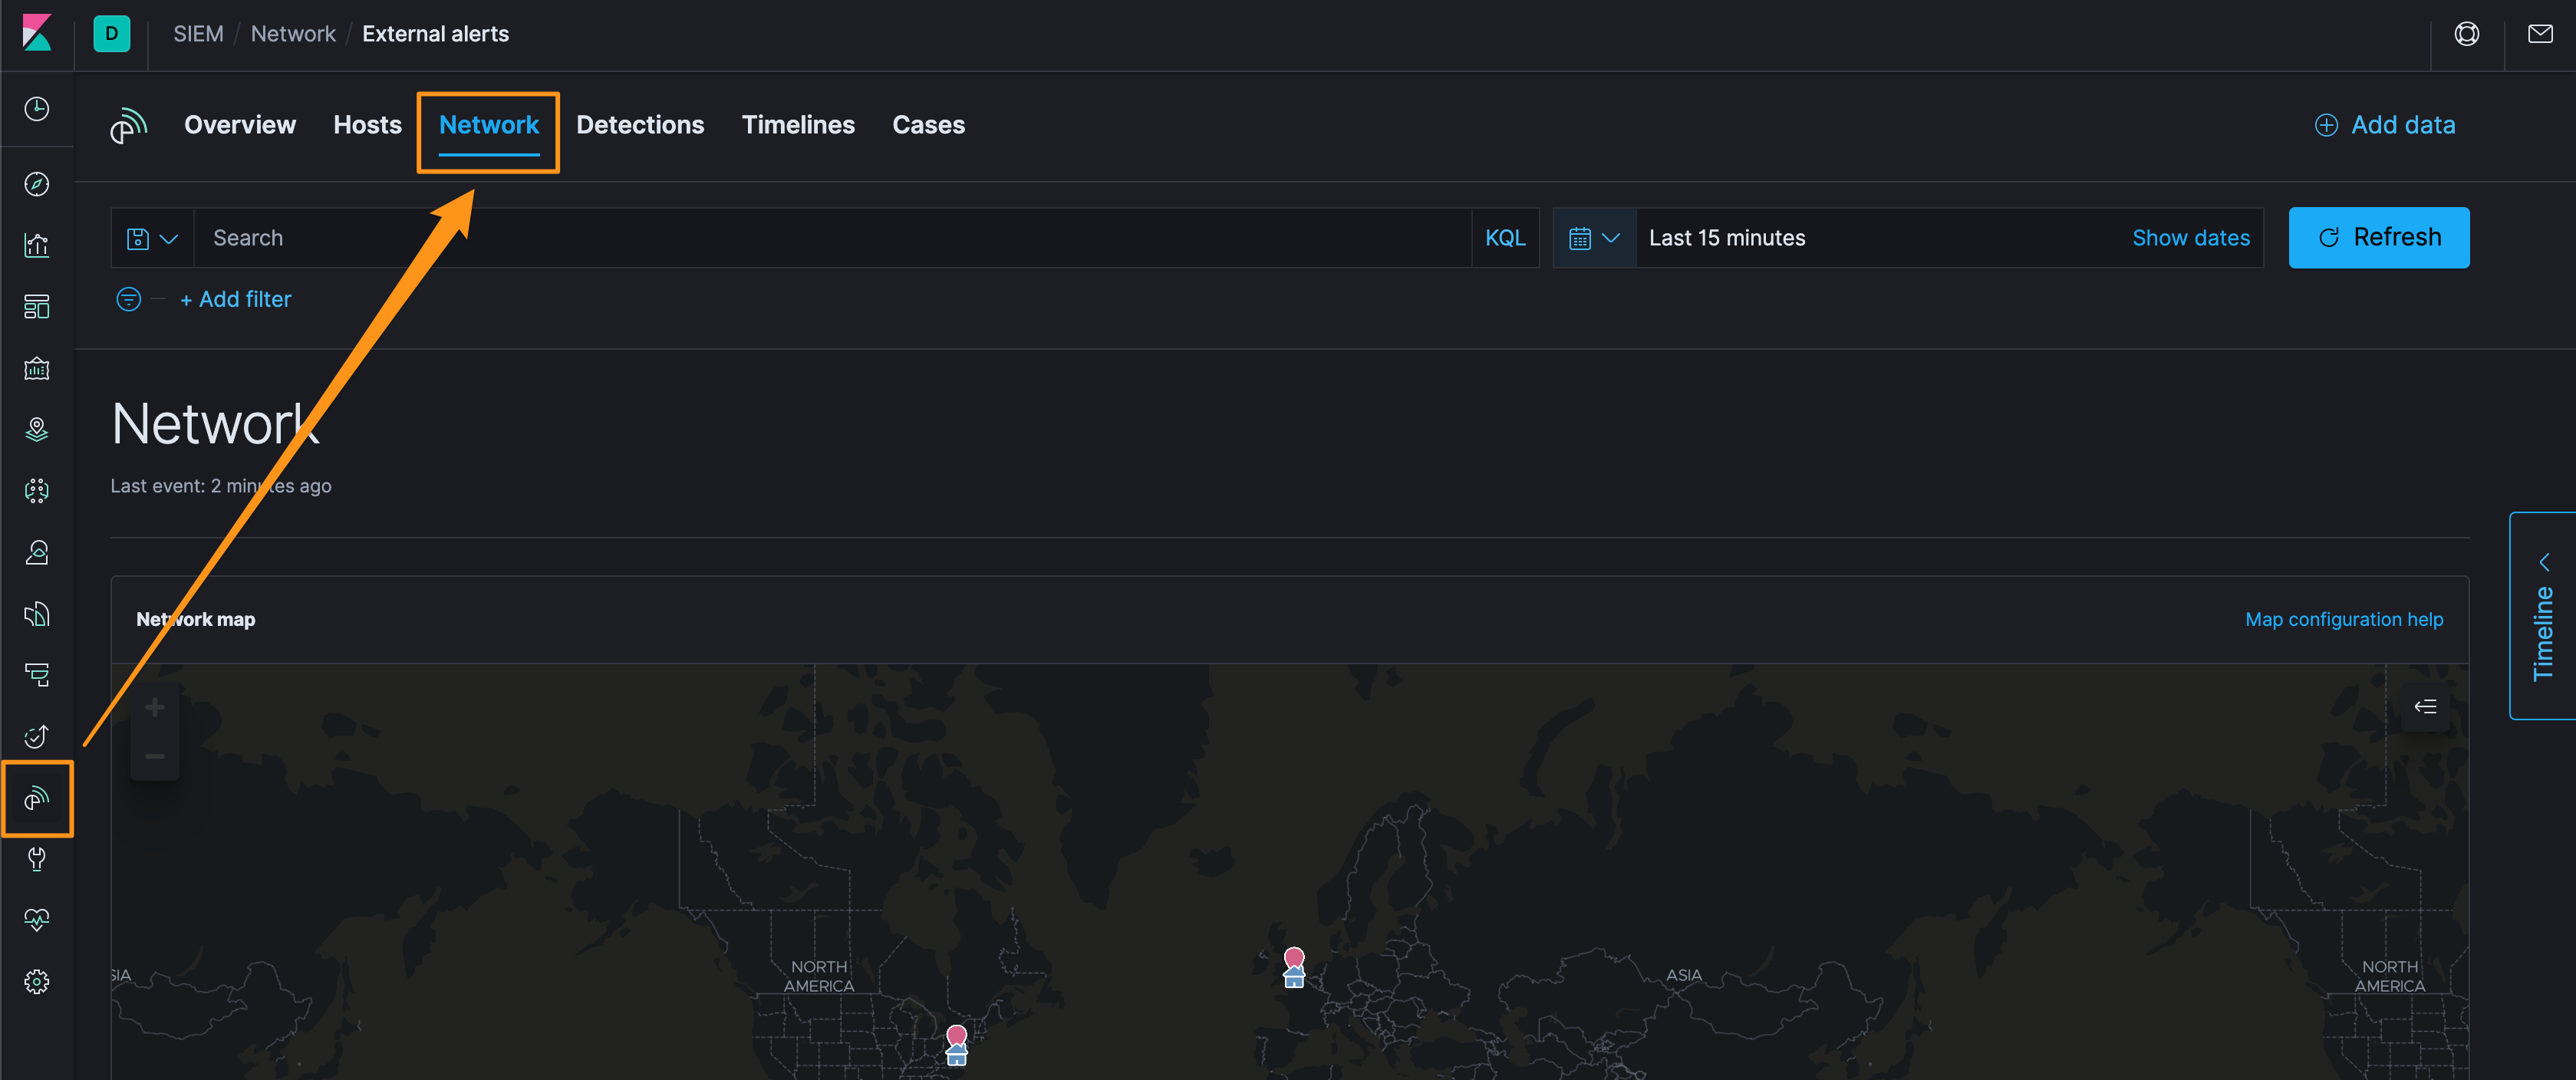
First, let’s get to the Network section of the SIEM, and then to the External Alerts. It’s a bit clunky to show how to get there with screenshots, but click on the SIEM app on the left, then Network, and then about 1/2 down the page, there’s the “External Alerts” tab (you may want to customize what is displayed in the External Alerts - I usually click on the hamburger menu and add rule.description at a minimum).
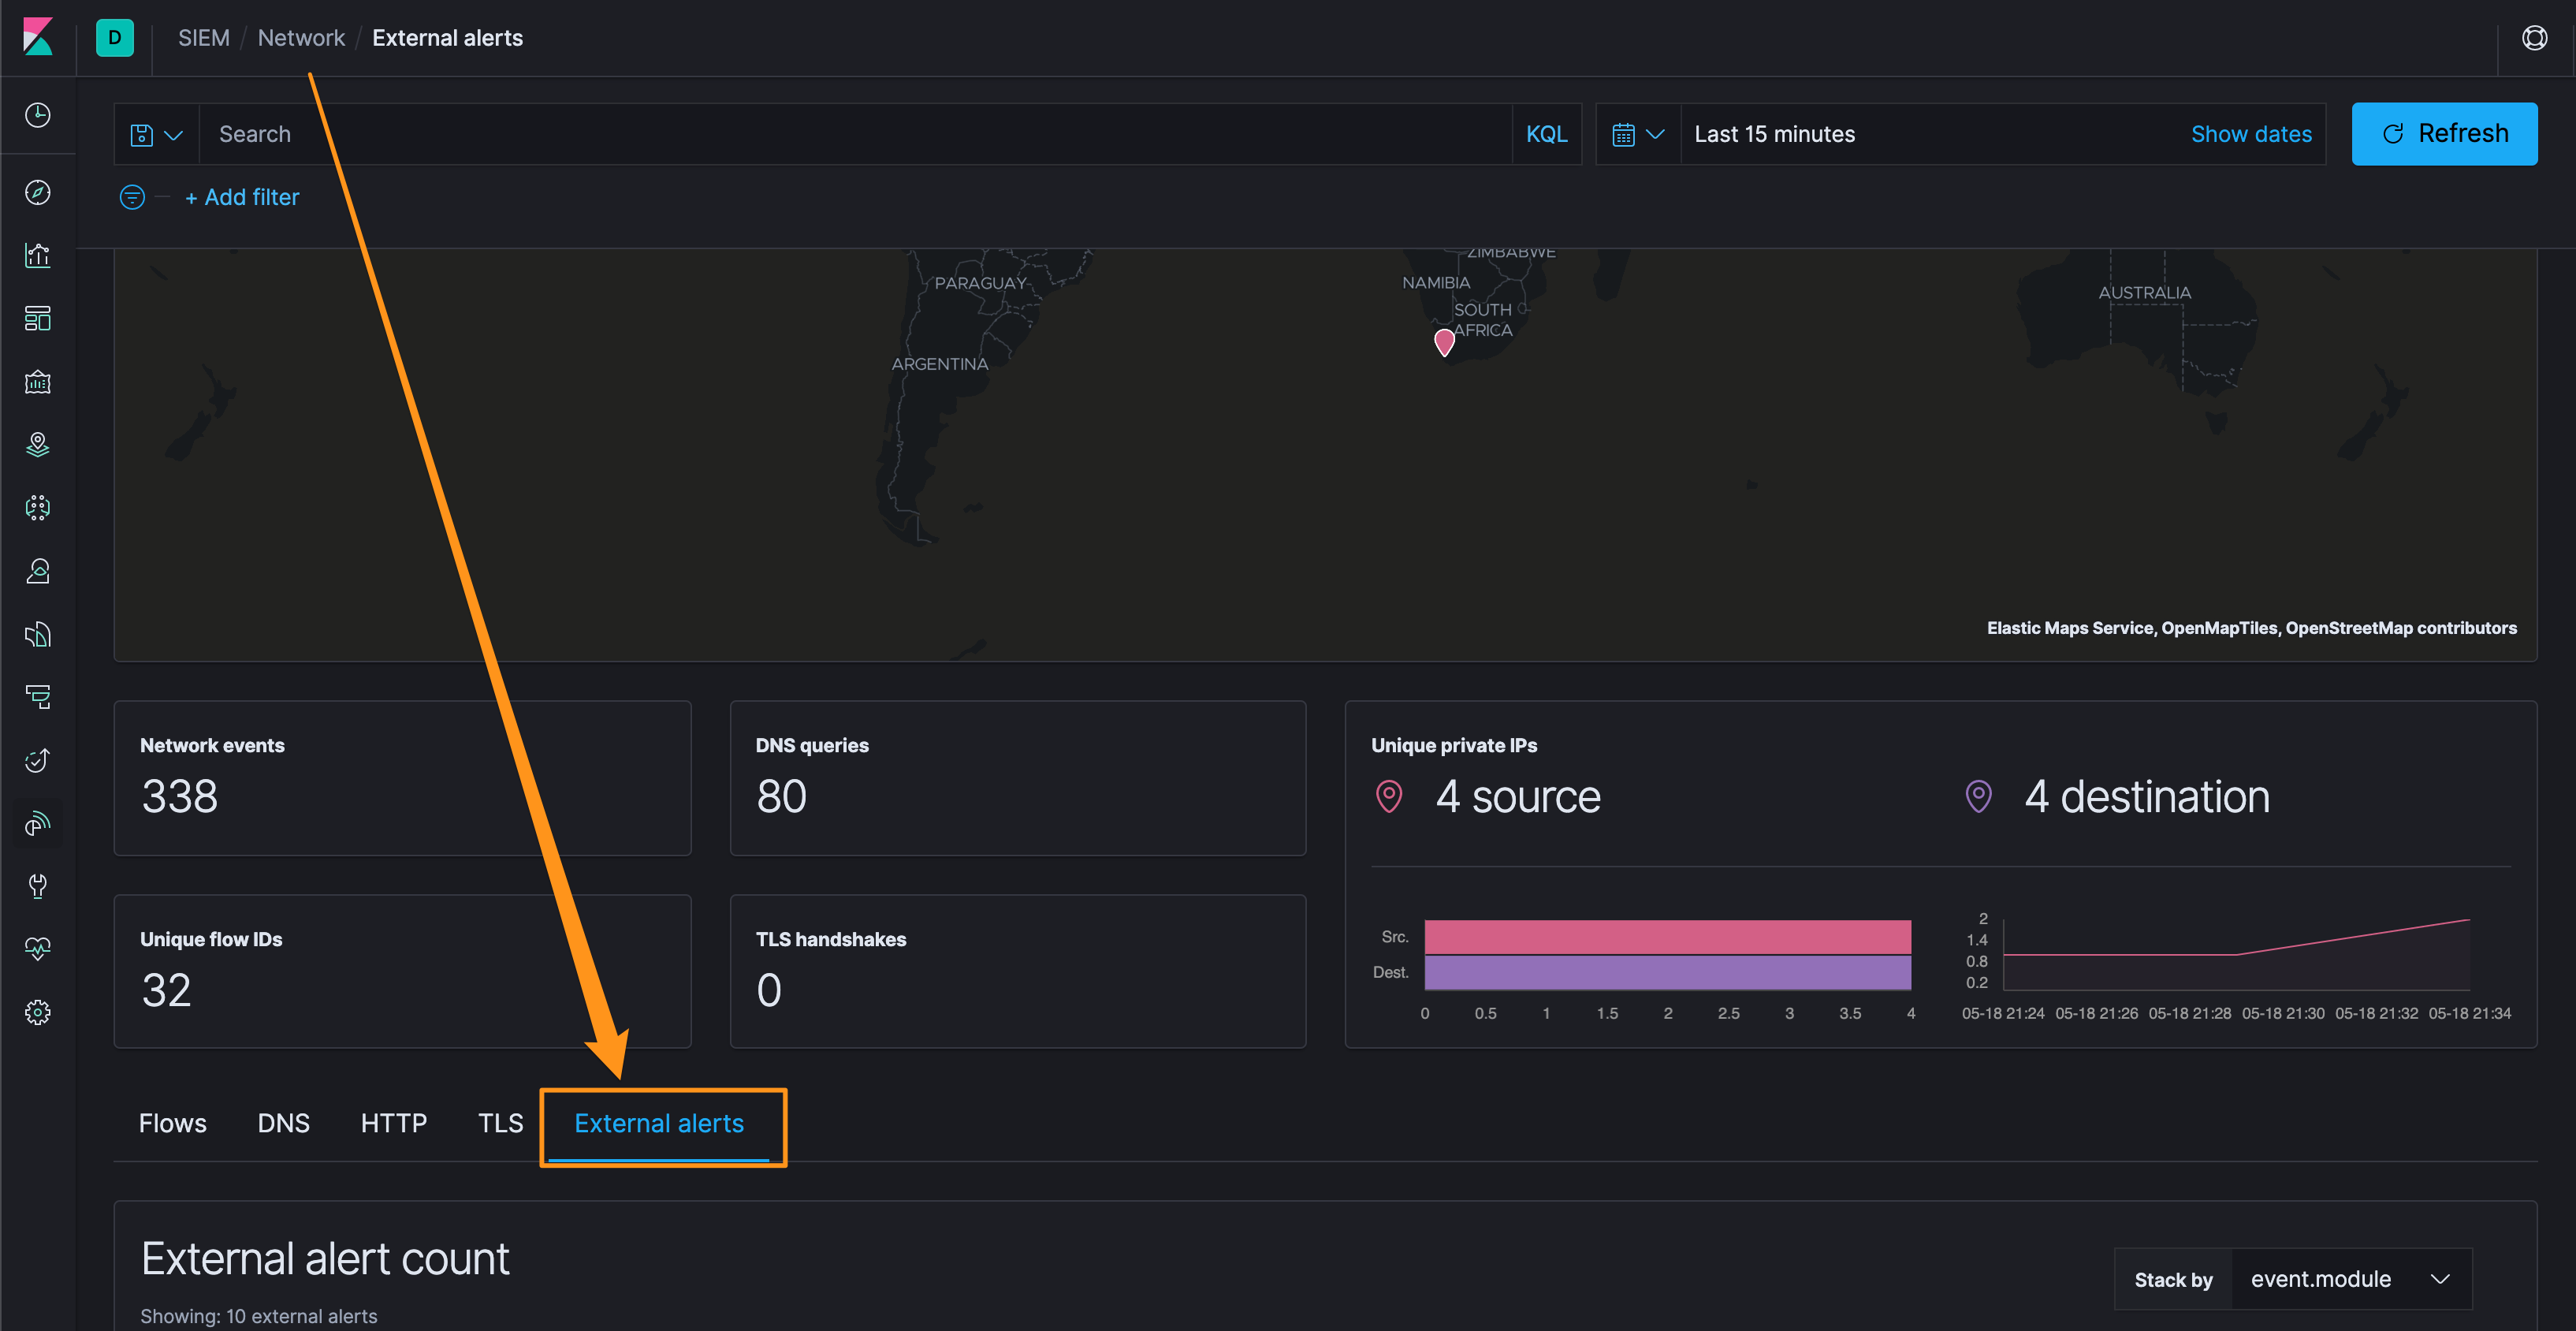
Let’s grab one of the events, ET MALWARE Fareit/Pony Downloader Checkin 2 and click and drag it onto the “Timeline” sidecar on the right-side of the screen. Click on the Timeline to open it, drop down the events, poke around, give it a name, etc.

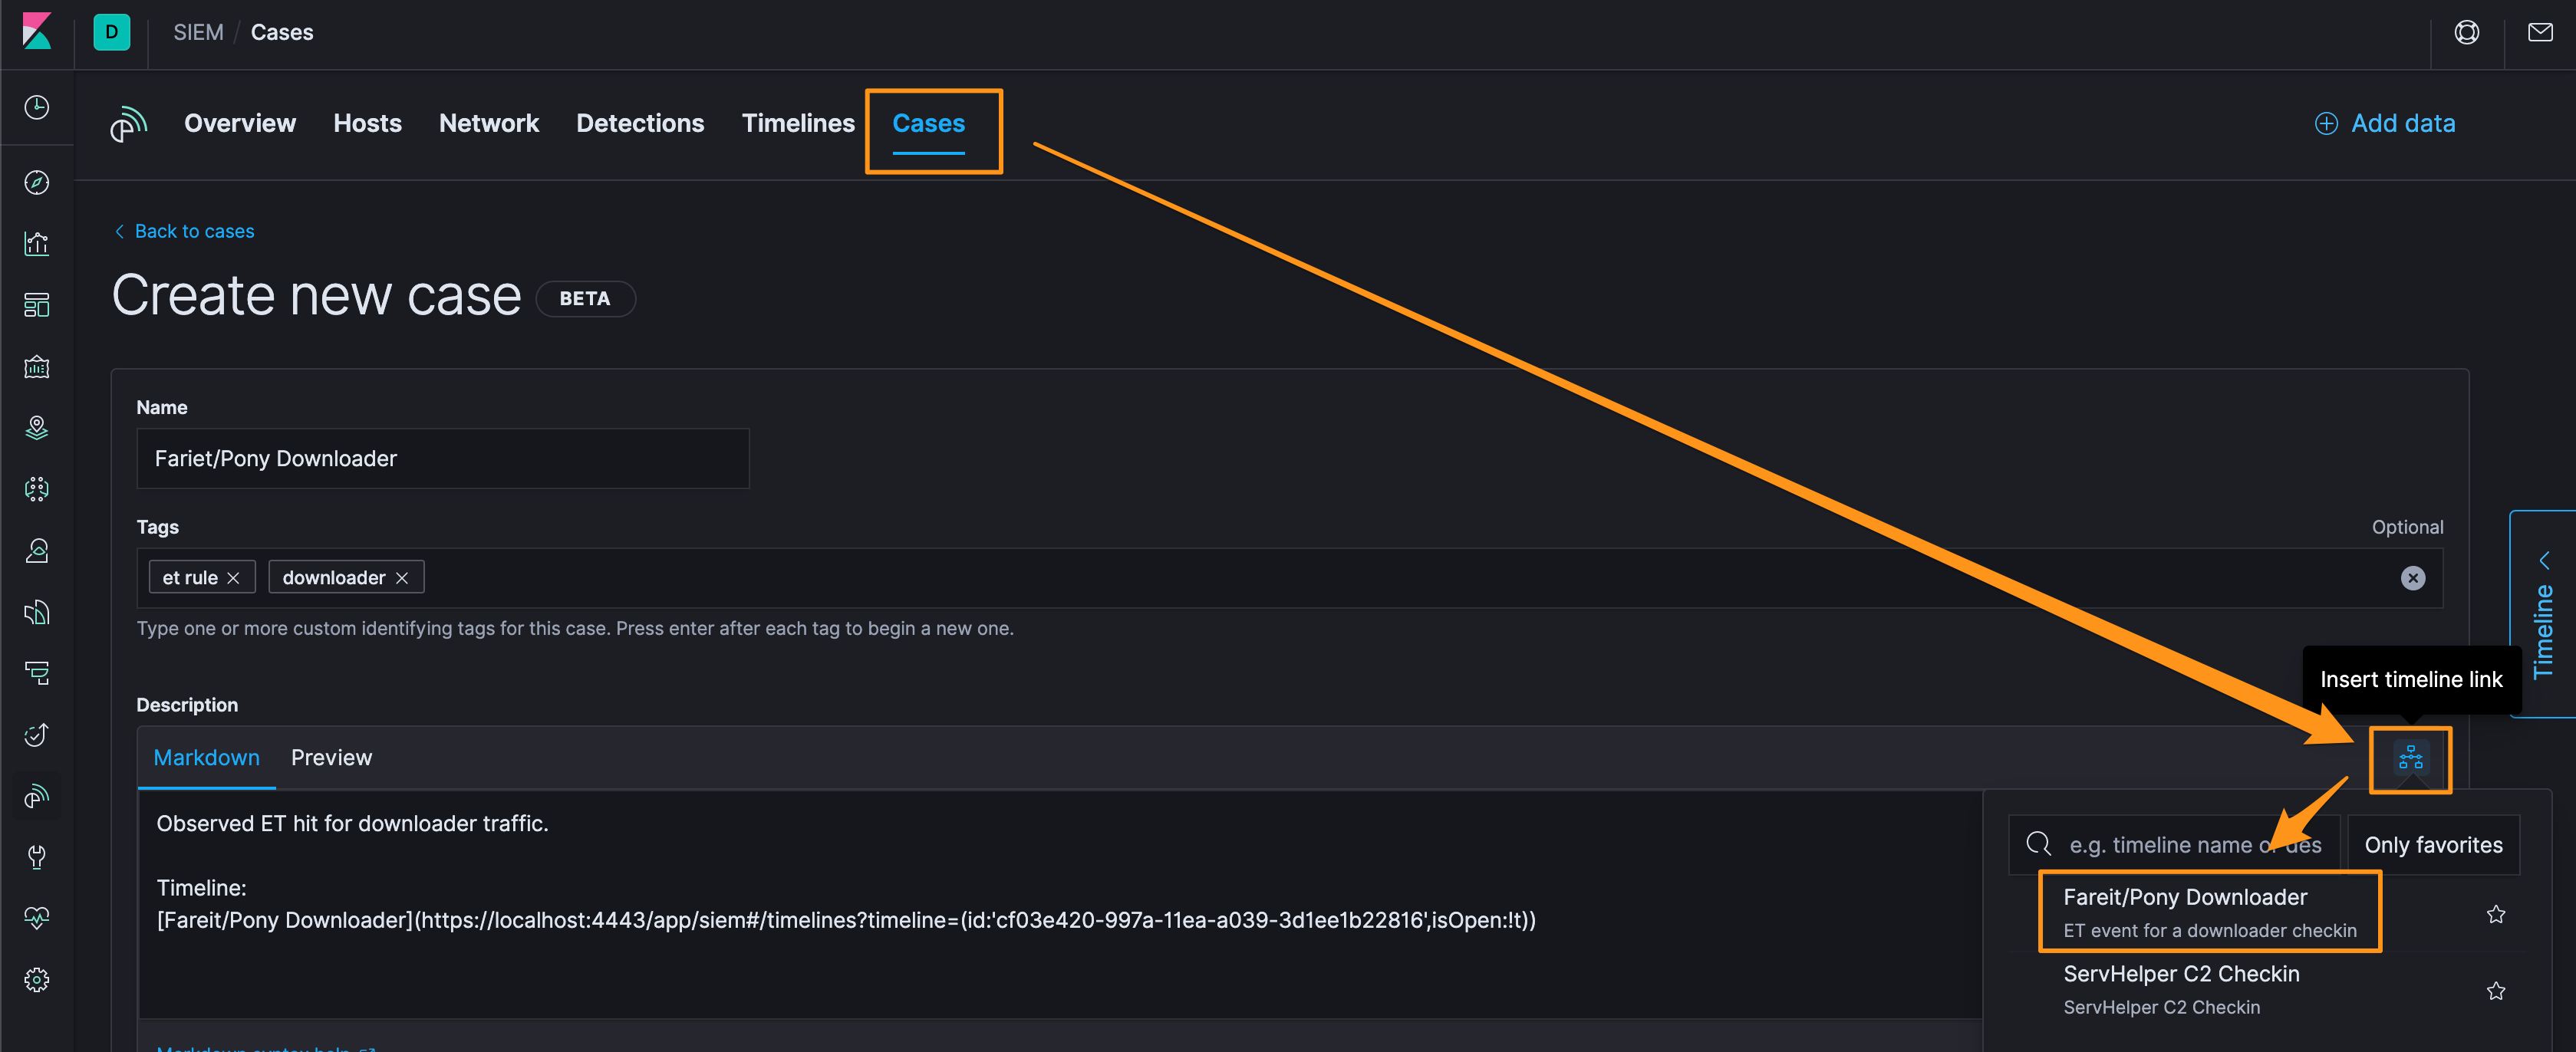
Now that we have a Timeline event, let’s check out the Cases tab. Now, integration with 3rd party systems isn’t part of the Basic License, but you can still do some basic case management.
Give the case a name, a few tags that make sense, and add the Timeline we just created. Of note, everything is in Markdown, so the syntax is standard and doesn’t have a sharp learning curve…not to mention sidestepping the formatting silliness you get when you copy/pasta into document editors.
Now you’ve got an open case and you can make notes. When you’re done, you can close the case.
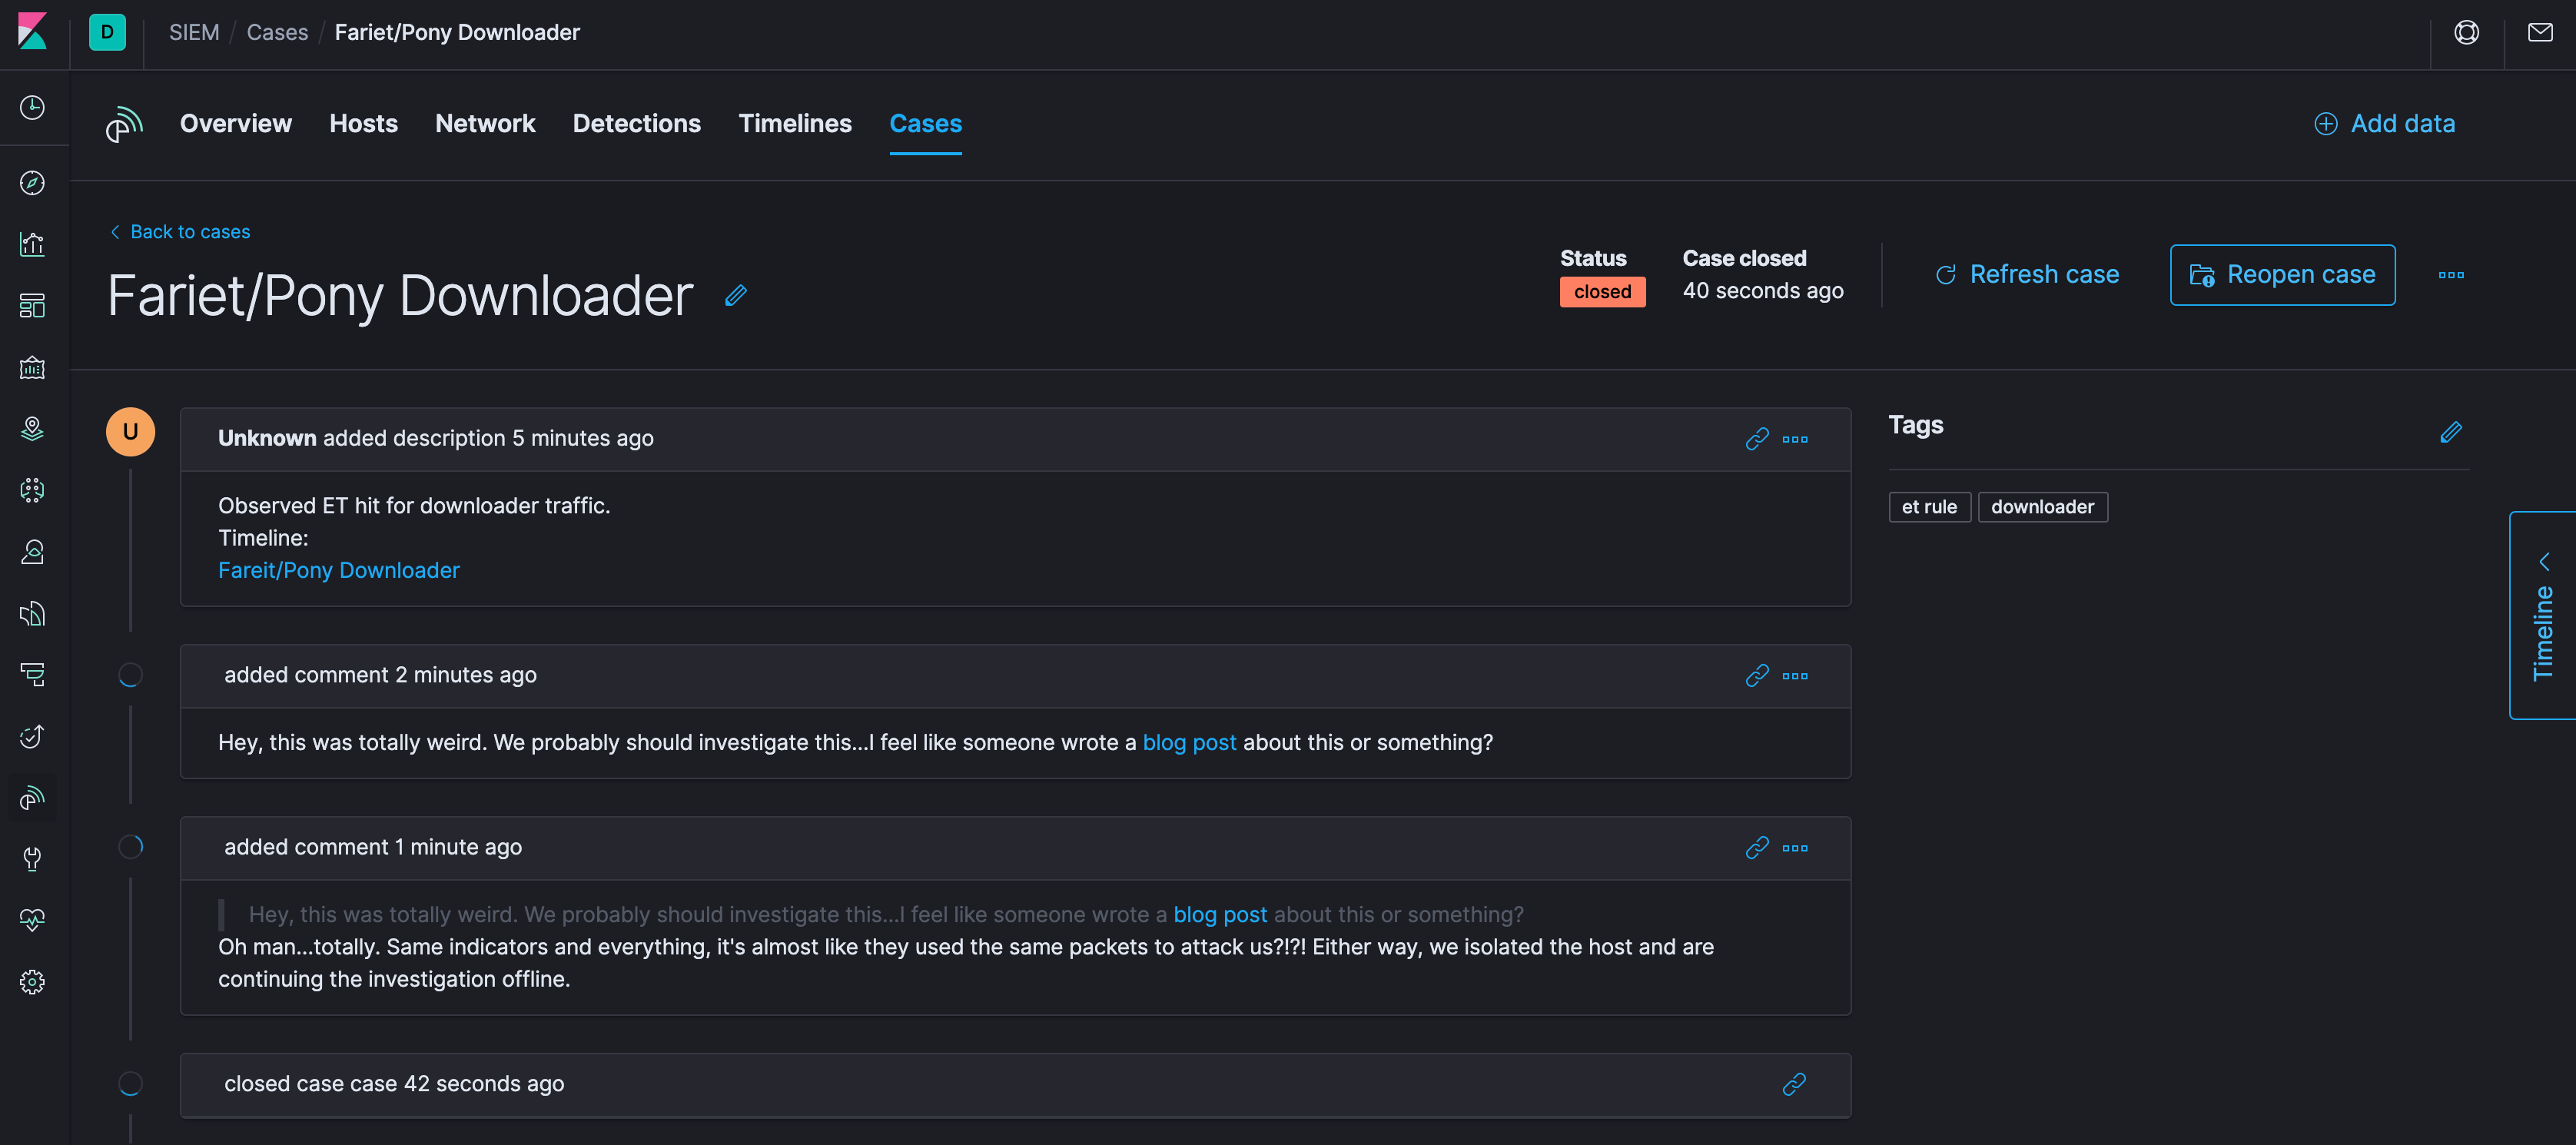
Again, it’s still beta right now, so there is just basic functionality; but with Elastic releasing huge updates every 9-10 weeks, getting familiar with the basics will get you that much further along when the features start rolling in.
Until next time, cheers and happy hunting!